The Marks of Poor Grinding: How to Recognize Waves, Rings, and Pad Marks
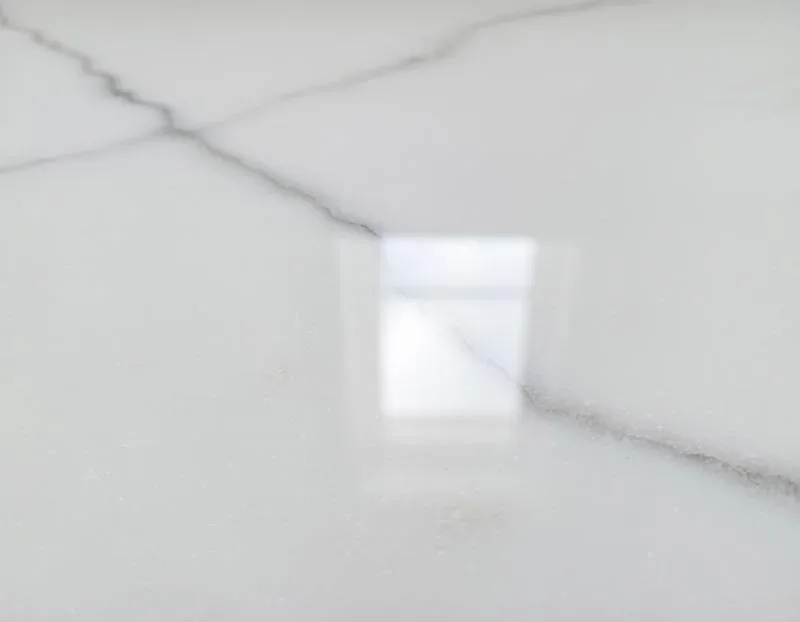
When grinding is finished, the floor looks shiny at first glance; the real test comes a few days later, when the morning sun hits the floor through the window or when the ceiling lights come on in the evening. That is when some floors show fine rings, a wavy reflection, deep scratches running in random directions, or cloudy stains that turn slippery to the touch. Most of these are not flaws in the stone but the signature of a mistake made at a specific stage of the work. In this article we go through the marks left by poor grinding one by one, explain where each comes from, how it is corrected, and what you should ask of the contractor doing the work.
In short: Rings and curved scratches usually come from a skipped or half-finished step; a wavy reflection from a floor polished without being leveled first; random deep scratches from a dirty pad or carried-in grit; and cloudy, slippery stains from excess polishing powder or crystallization product. Correction requires going back to the step where the mistake was made.
How to Spot Poor Grinding
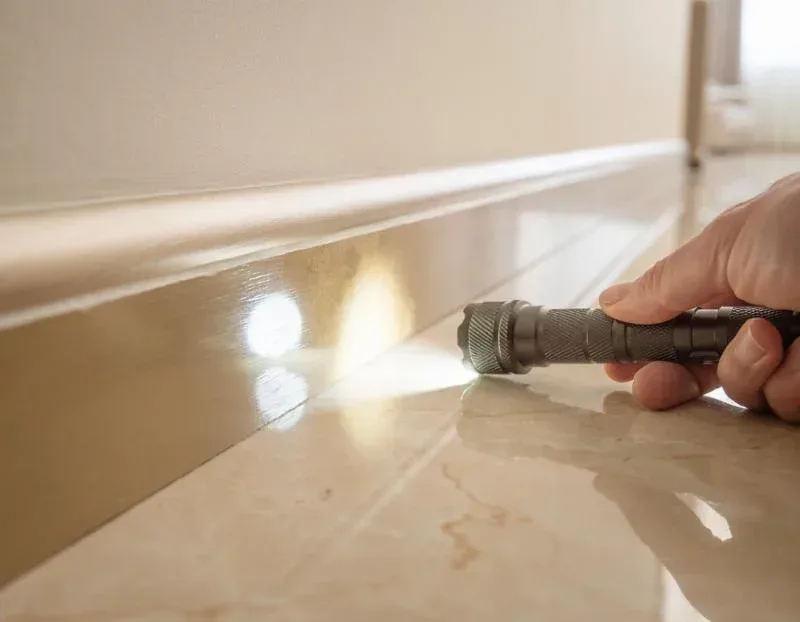
Most grinding defects are not visible when you look straight down at the floor. For visual assessment, the light source needs to hit the floor as nearly horizontally as possible. Low-angle daylight coming through a window, a flashlight held almost parallel to the floor, or a lamp at the end of a hallway will make even the smallest surface irregularity stand out through shadow. To look for defects, crouching down and watching the reflection of the light from a distance tells you far more than looking from directly above.
The second approach is to look at the reflection itself. On a well-ground and properly polished floor, a ceiling lamp or window frame is reflected with sharp, straight lines. If the reflected line curves, breaks, or shifts as it passes from one slab to the next, there is a flatness problem in the floor. If the reflection is sharp everywhere but is interrupted at certain points by a milky haze, the problem is most likely a product residue left on the surface.
To make the assessment easier, it is useful to view the floor under three different lights:
- Low-angle daylight: Light coming through the window in the morning or late afternoon shows rings, curved scratches, and pad marks most clearly.
- Artificial ceiling light: The reflection of the lamps reveals flatness differences and waviness at slab joints, so the floor should be checked in the evening as well.
- Flashlight: A flashlight held almost level with the floor is used to inspect areas that daylight does not reach, such as the base of walls, corners, and spots under furniture.
Rings and Curved Scratches: The Skipped Step
The most common mark of poor grinding is fine, curved, or ring-shaped scratches covering the floor when viewed against the light. These marks usually take the shape of the machine's rotating motion; they appear as interlocking arcs with a single-disc machine and as small spiral patterns with a planetary machine. The cause is almost always the same: the next step was started before the marks of the previous step were completely removed.
In grinding, each diamond step erases the scratches left by the previous one and leaves its own, finer scratches in their place. When a step is skipped or rushed, the deep scratches of the coarse step cannot be removed by the fine steps; their edges are only softened and the surface is polished over them. On a matte surface these scratches are not visible at all, but once the final polish makes the surface mirror-like, they all show up. We explained the order of the diamond steps and the function of each in our article on diamond pad grit numbers .
Correcting this defect cannot be done with a quick polish refresh. You have to go back to the step that left the rings, or even the one before it, and complete the rest of the sequence in full. That is why, on a job with no intermediate checks, when the defect is noticed at the polishing stage, a significant part of the work has to be redone.
Waviness: A Floor Polished Without Being Leveled
Waviness is the condition where the reflection is not flat even though the floor is shiny. In a long hallway, the reflection of the ceiling lamps curves like a snake, and at slab joints the reflection breaks for a moment and then continues. This appearance shows that the surface was only polished without eliminating the level differences in the floor.
Resin-bonded diamond pads have a flexible backing; they follow the undulating surface of the floor and do not flatten it. Flattening is done by metal-bonded abrasives with a hard base. If the metal step is not applied at all, or not applied for long enough, on a floor with level differences, all the following steps copy the old wavy surface exactly. The resulting floor is shiny but wavy. We covered in detail how level differences are measured and eliminated in our article on lippage .
Another cause of waviness is using the machine with the wrong weight or at the wrong speed. A light machine cannot flatten a hard stone; lingering too long at one spot with a coarse abrasive digs a shallow depression there. The result is a slight dishing seen in the middle of the slabs rather than at the joints.
Machine Tilt, Edge Differences, and Crescent Marks
When the grinding machine does not sit completely flat on the floor, only one edge of the abrasive surface works. When the machine's handle is held too high or too low, or when the machine's wheels and weight balance are not adjusted correctly, successive crescent-shaped marks form on the surface. These marks concentrate especially at points where direction changes and where the machine stops and starts.
Another familiar defect is the edges along walls and corners looking different from the central area. Large machines cannot get closer than a few centimeters to the wall; this strip is worked separately with small hand-held machines. If the edge work is not taken through the same steps, or if the hand-held machine is used with different pressure, a matte or differently toned frame remains around the room. Although this frame may be partly hidden once furniture is placed, it is immediately noticeable in empty areas.
Marks like these are usually corrected by running the affected area through the last few steps again. However, if the crescent marks are deep, that is, if they formed in the coarse step, the correction again requires going back to that step. For this reason, having the edge work done with the same sequence of steps as the central area, and by the same crew member, improves consistency.
Dirty Pad and Carried-In Grit: Random Deep Scratches
Unlike ring marks, some scratches are irregular: a long, deep line in one part of the floor, a short scrape in another. What these scratches have in common is that they are much coarser than the step they occur in. Their sources are usually two things: a pad used in the coarse step getting mixed in with the fine step, or sand, stone fragments, or metal pieces trapped under the pad.
The slurry produced during grinding contains coarse particles left over from the coarse step. If the floor is not thoroughly rinsed and cleaned up between steps, these particles get under the fine pads and scratch the surface again. The same problem also results from not cleaning the pads between steps or from carrying the pads of different steps in the same bag. Grit brought in from outside on the crew's shoes can have the same effect.
This defect is especially notable because it can easily be prevented in a professional job. The ways to prevent it are clear and simple:
- Washing between steps: After each step, the slurry is completely removed, the floor is rinsed with clean water and dried, so that coarse particles are not carried to the next step.
- Pad organization: The pads for each step are kept in a separate place and washed after use, and worn, torn, or hardened pads are not used.
- Clean work area: The crew wearing shoe covers when entering the work area and wiping the machine wheels prevents grit from being carried in from outside.
Polishing Powder and Excess Crystallization: Haze, Burn, and Slipperiness
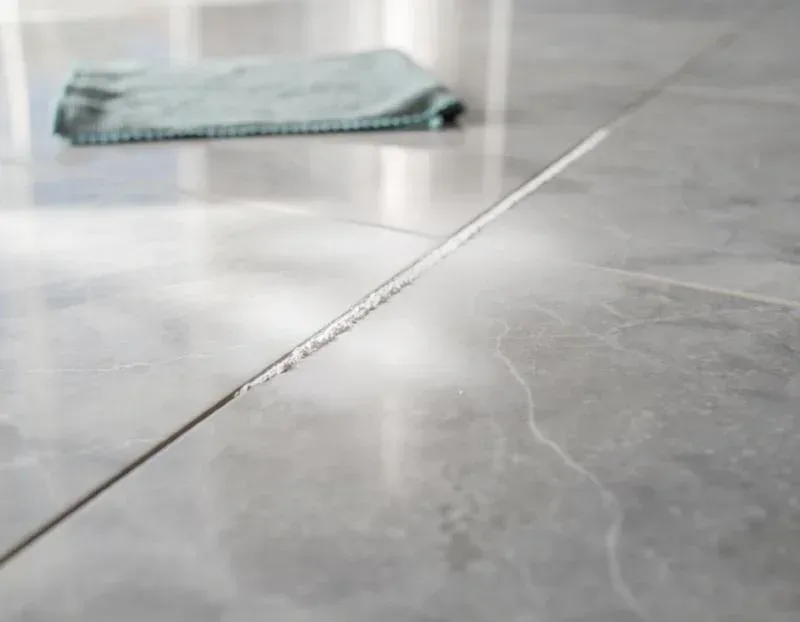
Polishing powders and crystallization products used in the final polish give marble a deep shine when applied in the right amount and for the right duration. When overused, however, they leave their own marks. Powder residue left on the surface forms a milky haze as it dries; it accumulates as a white line especially at grout edges and slab joints. Since some polishing powders contain acidic components, they can etch the surface instead of polishing it when left on the same spot for a long time.
Excess crystallization also causes problems. Working on the same spot for a long time and at high heat can leave a burnt-looking, slightly yellowish, or dull stain on the surface. Crystallization applied in layer after layer can make the floor extremely slippery and, over time, create a surface that flakes off. We have also explained how polishing powders work in our article on marble polishing powder .
Because these defects are mostly on the surface, they are relatively easy to correct: the residue is removed with a neutral or mildly alkaline stone cleaner, and the burnt or over-crystallized area is lightly ground with fine diamond pads and then polished again in a measured way.
Which Mark, Which Correction?

Classifying the marks of poor grinding is necessary to determine the scope of the correction. The table below summarizes the marks, their likely causes, and the stage to which you need to return for correction:
| Observed mark | Likely cause | Correction |
|---|---|---|
| Fine rings and curved scratches | Skipped step, half-finished step | Return to the step that left the mark and complete the sequence |
| Curved or broken reflection | Leveling not done or insufficient | Re-leveling with a metal-bonded step |
| Dishing in the center of the slab | Dwelling in the same spot at the coarse step | Leveling the area together with its surroundings |
| Crescent-shaped marks | Machine tilt, incorrect weight balance | Repeat the pass with the correct setting at the relevant step |
| Dull frame along the wall | Edge work missing or done with different pressure | Running the edge through the same steps |
| Random deep scratches | Dirty pad, carried-over grit | Re-honing at the step that matches the depth of the scratch |
| Milky haze, white joint lines | Polishing powder residue | Cleaning and repeating the fine polish |
| Yellowish, dull or slippery stain | Excessive crystallization, overheating | Light honing and measured re-polishing |
As the table shows, some marks are only surface-related, while others go to the heart of the job. Waviness and deep rings are structural flaws hidden beneath a good-looking final polish, and correcting them takes almost as much effort as a new job.
When planning the correction, you must also take into account how many times the floor has been honed before. Each re-honing removes a little more stone; this allowance is limited, especially on thin slabs, thresholds and stair nosings. Therefore, instead of starting the correction at a coarser step than necessary, finding out through a small test at which step the defect actually occurred protects both the stone and your time.
What Should You Ask the Contractor For?
When the marks of poor honing are noticed, the first step is to report the situation in writing, with photos, to the company that did the work. It is important to take the photos in low-angle light so that they show the marks; a photo taken straight on can make the floor look flawless. Stating in your report where, when and under what light the marks were seen makes it easier for the company to understand the cause.
The following are things you can ask the company for in order to prevent defects in a honing job and, if necessary, correct them:
- Test area: Processing a small section with the full sequence of steps before starting the job lets you see the expected result and possible problems from the outset.
- Step list: Specifying in writing the steps to be applied and the final polishing method helps you determine afterward whether any step was skipped.
- Interim inspection: On large jobs, examining the floor together with side lighting after certain steps allows a defect to be caught before it is carried into the polish.
- Walkthrough at handover: When the job is finished, the floor should be inspected together in daylight and under artificial light, and any defects seen should be recorded in the report.
We have gathered the points to check at handover in a list in our article on post-honing acceptance inspection . If you are not sure at which stage the marks on your floor originated, you can ask us for a second opinion with a few photos taken in low-angle light.
Defect or the Nature of the Stone?

Not every mark is a sign of poor polishing. The soft veins, crack lines, and porous areas found naturally in some marbles will not shine as much as the surrounding surface, no matter how carefully they are polished. These differences are more pronounced in dolomitic marbles and heavily veined slabs.
The way to tell these natural differences from defects is to look at the pattern. Polishing defects follow the movement of the machine: they form rings, spirals, or regular arcs. Differences that come from the nature of the stone follow the direction of the vein, crack, or fossil and have nothing to do with the machine's movement. In a test area, these differences can be seen and discussed in advance.
How We Carry Out Corrective Work

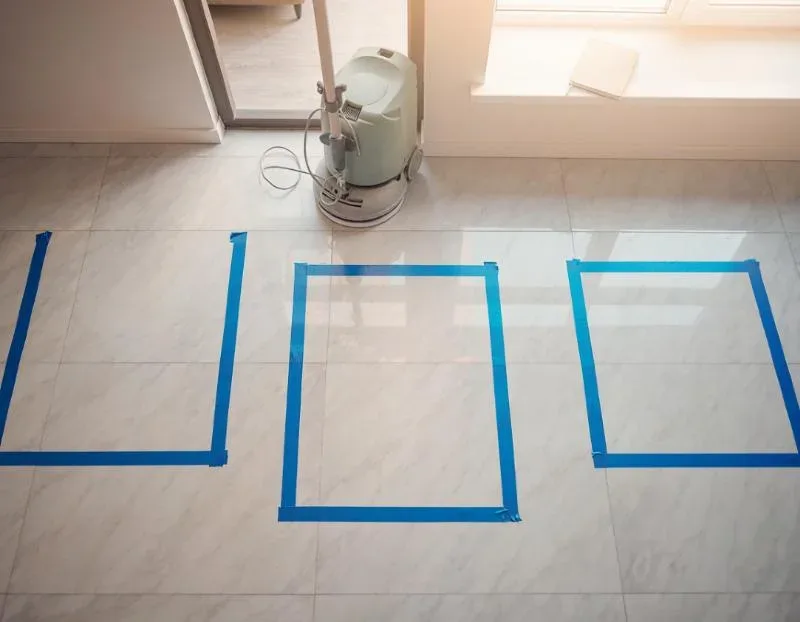
When we are called in to correct honing work done by another crew, we start by mapping the floor. The entire floor is surveyed under low-angle light, and areas with swirls, waves and deep scratches are marked with tape. Then a small test is carried out in one of the marked areas to find out which grit stage the marks come from.
The stage identified becomes the starting point for the correction. If the defects are widespread, the entire floor is reworked from that stage; if they are localized, the areas are honed together with their surroundings, and the final polish is applied to the whole floor in a single pass so that no patchy look appears.
When assessing honing defects, hold your phone close to the floor and photograph the surface toward the light source; a photo taken from a perpendicular angle will not show the rings and waviness at all. — Expert Note
Frequently Asked Questions About Poor Polishing and Correction
01Can a poorly polished floor be re-polished?
02Do ring marks disappear on their own over time?
03If the defects are only in one room, does the whole house need to be re-polished?
04Is a floor that has become slippery a polishing defect?
05Is it possible to cover up the marks of poor polishing with a polish product?
Related Articles
Post-Grinding Acceptance Inspection: A Checklist for Gloss, Flatness, and Stains, Diamond Pad Grit Numbers: The Logic of Progression from Coarse Grinding to Polishing, What Is Lippage? Eliminating Height Differences Between Slabs, What Is Marble Polishing Powder? Proper Use and Risks, Contracts and Warranties for Grinding Work: Which Clauses Should Be in Writing?